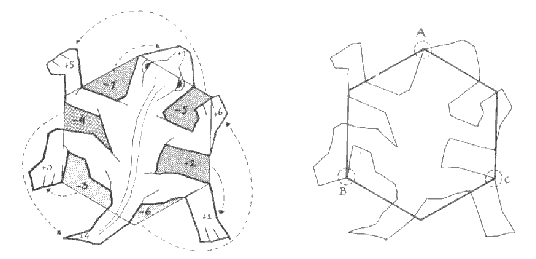
In the TOP View . . . Make a cylinder with 6 sides. *This is to be used as a reference object.
Create Primatives > Polygon > Cylinder ◻
It should look like this.
Push it back in the Translate Y: –1 units.
Change the Pivot Point to the lower left side. Press {Insert} in the keyboard to toggle ON the Pivot Point movement. Use Snap to curve {c} to align it with the corner. While holding the {c} key, move the cursor over the curve you want to snap it to, hold down the middle-mouse button, and move it to where you want it on the curve. In this case, all the way over to the lower left.

Press {Insert} to toggle OFF the Pivot Point movement. Move your hex shape to Origin (0,0,0) Use Snap to Grid {x} align it with the center of the workspace. While holding the {x} key, move the cursor over the point you want to snap it to, hold down the middle-mouse button, and move it to where you want it on the grid. In this case, in the center of the grid.
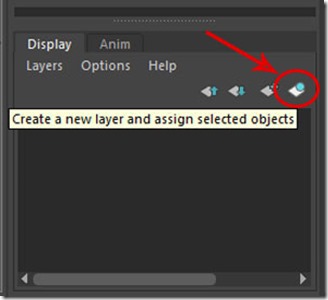
Make a new layer and add this object to it. Select the Reference Cyclinder and in the Display Menu which is located at the bottom of your Channel Box, press the icon with the white sheet and blue sphere. This will create a new layer and add the selected objects. Toggle reference setting to on, a ‘R’ will appear, click twice.
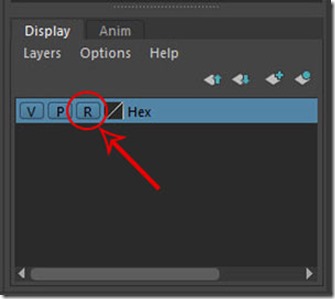
Label the layer Hex. Double-click on the layer name and Edit Layer menu will appear. Change the name to “HEX_Reference”.


Also turn-on wire-frame on shading. The edges should turn grey. In the workspace menu Shading > check the box next to Wireframe on Shaded.


OR you can toggle on Wireframe on Shaded here.
Create a curve from the Origin (0. 0. 0) to the right, one unit long to the right. Create > Curve Tools > EP Curve Tool *Reset tool first. This is also the length of the HEX_Reference base. I used Snap to Grid {x} to make sure it was exactly 1 unit long. Hold down {x} while you click on each location on the grid.
Now hide the HEX_Reference Layer – Toggle the Visibility. Click the first check box for the Hex Layer.
*** Before you Duplicate, reset settings.
Using Duplicate Special, create an Instance of this curve Reflecting it over the Y-axis or vertical axis. Select the curve Edit > Duplicate Special and change the Scale x to –1.

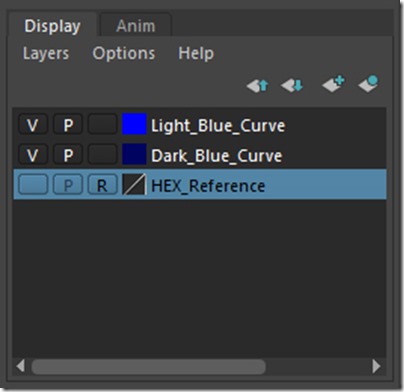
Make a new layer for each curve. Change color of each layer. Make the first curve layer a dark color (Dark Blue) Select the object you want added to the group and press the button with the white sheet and Sphere, “Create a new layer and assign selected objects”
*The names in the image are wrong
I named the right curve “Dark_Blue_Curve”
I named the left curve “Light_Blue_Curve”
I named the left curve “Light_Blue_Curve”
| In mathematics, here is a graph of our parent function |
 |
| The translation of the parent graph is a reflection over the y-axis. |
Test to see if it worked. Switch to vertex mode, and move a vertex. The curve should be refelected over the Y-axis basically mirror itself. If you select any vertex the mirrored corrsponding vertex will also become selected. If not, you might not have selected Instance when you duplicated the curve.

*Undo the moved vertex.
Select only the left curve (light blue) and Reflect it over the X-axis this time. Change the Scale Z to –1.
Change the Scale Z in the Channel Box.

*Undo the moved vertex.
Select only the left curve (light blue) and Reflect it over the X-axis this time. Change the Scale Z to –1.
Change the Scale Z in the Channel Box.
*The image are wrong – Scale Z not Scale Y
It will appear that nothing has changed, until you move a vertex.
Switch to vertex mode, and move a vertex again. The curve should be reflected over both the x-axis & the y-axis.

Undo the moved vertex.
Rotate the new curve –60 degrees in the y-axis. Unhide the the Hex Reference Layer again.

Change the Rotate Y in the Channel Box to –60.
*The image are wrong – Scale Z not Scale Y

It should align with the reference hex. If it doesn’t, start over.

Select both curves and group them. {CTRL} + {G} Label the group “Blues_Curves”

It should align with the reference hex. If it doesn’t, start over.

Select both curves and group them. {CTRL} + {G} Label the group “Blues_Curves”
*The names in the image are wrong


Now unhide the HEX_Refernce Layer.
Move the pivot point of the group “Blue_Curves” to the center of the Hex Reference using snap to curve.
Now hide the Hex Layer, we just used it to find the center of the Hex. **Moving the pivit point is really the only reason why we need the reference cylinder.


Hide the Hex again.

*** Use ‘Duplicate’ not ‘Duplicate Special’ DO NOT use Instance for this step. Using Duplicate make two more sets of the grouped curves. Select the group, “Blue_Curves”, Duplicate it, {CTRL} + {d} and rotate it 120 degrees in the y-axis. Label each of the new groups “Red_Curves” and “ Green_Curves”
Make Layers for each curve and change the colors. It should look like this . . .
Select all the light colored curves and press the arrow up key.
Group the colored groups. This will select the 3 groups. You are grouping the 3 curve groups. Then label it “Tessellation_1”.
SAVE NOW WITH NEW NAME – Single .
Using Duplicate Special, make two more Instances, rotating them 120 degrees in the y-axis. This will be a set of three hexes. *Make sure you turn on Instance.


TESTING: Switch to Vetex Mode, move one vertex and the corisponding vertices should follow. *You should not be able to see curves beneath the moved curves.
Undo the moved vertex.
The main Tessellation is now done.
Select one of the upper curves in the top hex.
Select one of the curves in the left hex.
Press the {Up Arrow} key to select the Tessellation group.
Select one of the curves in the bottom hex.
Press the {Up Arrow} key to select the Tessellation group.

It should look like this:
SAVE NOW WITH THE NAME “Tessellation_Group_Of_3”
Make a second copy of all the tessellations:
Make a second copy of all the tessellations:
*You can’t Duplicate the group of 3, so we have to Duplicate the 3 hex groups.
It should look like this:
*** Before you Duplicate, reset settings.
Make a duplicate instance: Edit > Duplicate Special ◻ use Instance and apply. With the hexes still selected move them 5 units to the right.


Rotating the Tessellations:
Select the top hex and ADD 120 to the Rotate Z. Mine went from 0 to 120.
Select the left hex and ADD 120 to the Rotate Z. Mine went from 120 to 240.
Select the bottom hex and ADD 120 to the Rotate Z. Mine went from –120 to 0.
You should have all the colors lined up like this example. The greens are with the greens . . .
Make a second copy of all the tessellations:
*You can’t Duplicate the group of 3, so we have to Duplicate the 3 hex groups.
Select the 3 center curves and press the {Up Arrow} key to select all the groups.
It should look like this:
*** Before you Duplicate, reset settings.
Make a duplicate instance: Edit > Duplicate Special ◻ disable Insance and apply. With the hexes still selected move them 5 more units to the right. Translate X: 10


Select the top hex and ADD 120 to the Rotate Z. Mine went from 120 to 240.
Select the top hex and ADD 120 to the Rotate Z. Mine went from 240 to 360.
Select the bottom hex and ADD 120 to the Rotate Z. Mine went from 0 to 120.
You should have all the colors lined up like this example. The reds are with the reds . . .
SAVE NOW WITH NEW NAME.
NOW WHAT?


