Import the Sprite can image into the front view. *I have added the curves that I used to revolve it, since the lines are hidden in the photo. I recommend you grab your own can, nothing beats putting the reference in your hands. Once you import it, change the display settings to “Looking through camera” so that it does not get in the way in other views. Also you will notice that the image is not an orthographic view and the top and bottom is not flat. For the most part you will have to make it up.

*The best way to take an orthographic reference image is to get as far away as you can and zoom in using a powerful telephoto lens, otherwise you will have some wide angle distortion.
Line the image so that it is centered across the X-Axis and the bottom of the can sets on 0 on the Y-Axis. I also moved it back -20 units on the Z-Axis, this keeps it out of your way and places it behind the grid.
Now trace the edge of the can, but not the top cap. We will create a separate curve for that. Using the EP Curve Tool, trace the right side edge (the red curve) be sure to include the hidden curve at he bottom. Create --> EP Curve Tool –> (option box) select 1 linear.

Revolve the curve: In the Surface menu, chose Surfaces → Revolve (option box) Select Edit --> Reset Settings.
Choose Polygons, Control Points, and set the segments to 36
Check out the UVs that were created when it was revolved; They are probably not set up for applying a good texture. Window → UV Texture Editor.
Change the material. Maybe Blin.
This is how mine turned out.
There are an endless number of ways to layout your UVs. In this particular case I think the best way is to apply a cylindrical mapping. Create UVs → Cylindrical Mapping. The UVs are still not quit right.

Nothing has changed visually, but the two UV sections are separated by the cut edge. Select one UV, RMB click and choose UV. Then in the UV Texture Menu chose Select → Select Shell. Move and scale the UVs uniformly into the work area.

Re-map the UVs using planer mapping in the Y-direction. Create UVs → Planar Mapping (option box) choose Project From: Y-Axis.
Move and scale the bottom UVs to fit in the work area.
The Tab: I started with a pipe, shaped and scaled it.
I then deleted the inside faces of the pipe and then deleted them. After that I appended the pipe,
Create PSD Network: Now select the revolved geometry and create a PSD Network In the Rendering Menu Texturing –> Create PSD Network . . .
A new menu will pop up. Browse to save the folder to your project folder. Then in the Attributes Selection section, select the Color attribute and then press the right arrow. Color will transfer over to the selected attributes. Make sure that the check box for Open Adobe Photoshop is selected, so you do not have to think any more than you have to, Select Apply.
Photoshop should automatically open for you and should look something like this..
Move the Color folder under the UV Layout layer or you can just hide the bump layer. I always move the folder I am working in because I tend to forget to unhide it later. Either way, place the label in the color folder. Save the PSD and then go back Maya. You might have to update the PSD In the Rendering Menu choose Texturing –> Update PSD Networks. If for your image still does not show, press 6 on the keyboard. This will show all textures.,
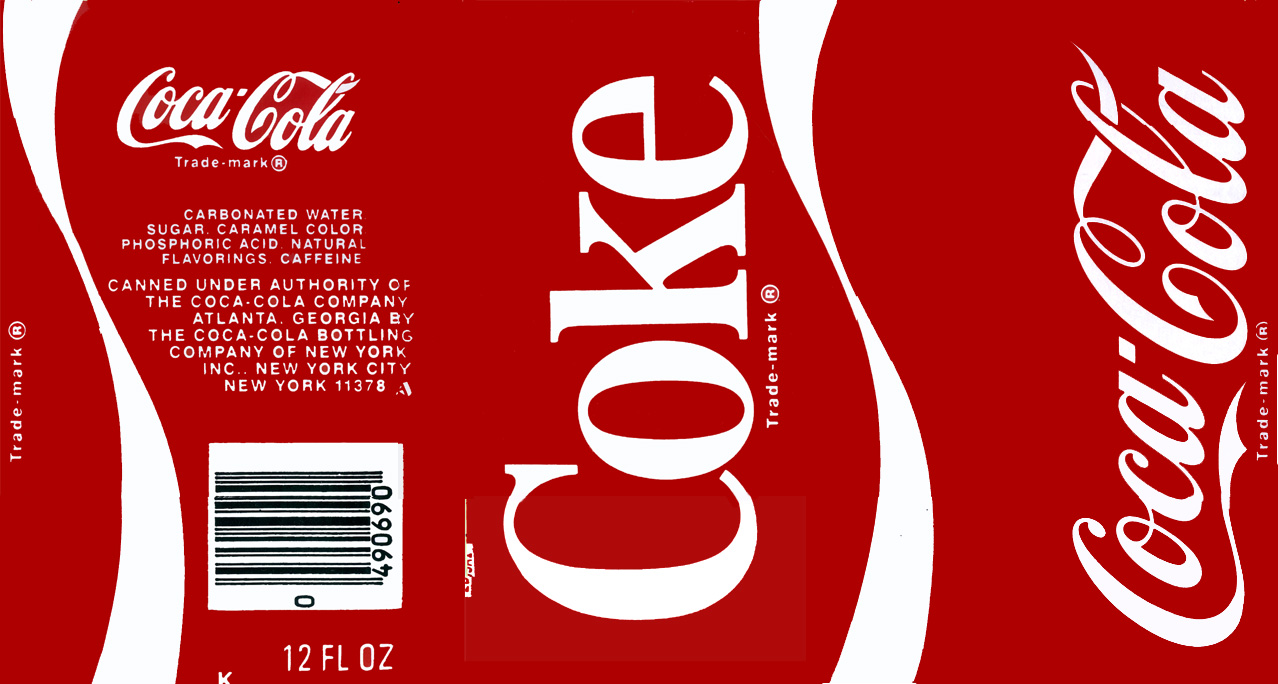
Here are some labels you can use.


Material Notes.
I found these notes on how to make an aluminum out of a phong material. Its not an ideal texture for a can, but it can be tweaked. If I tell you how I did it, you wouldn’t learn anything. See what you can do. . . .
Aluminum
Start with a Phong Shader. Make the color darker than the actual color chosen. Make the Specular Color almost a pure color of the color chosen as the primary, but just a little darker (this always seems to come out best for the aluminum). Change the Cosine Power to 2. Remember, the higher the Cosine Power, the tighter the specular rolloff, and aluminum has a large rolloff. The Reflectivity should be at .2, since aluminum has a low reflectance.

The Top – To be continued . . .


