PART 1 PART 2 PART 3 PART 4 PART 5 PART 6 PART 7 PART 8
PART 2: CREATING R2D2’s THE LEG
|  << SIDE VIEW >> << SIDE VIEW >>
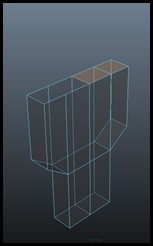
In the side view, create a cube to make the main section of the leg. *I used the same cube to that I used for the image plane placement. Align it between the top of the foot separator plate and the upper section where it changes shape.
*When you create the cube, make sure you change its Depth Divisions to TWO. This will give you a center line.
|  << SIDE VIEW >> << SIDE VIEW >>
Select the top faces and extrude upward until the base of the arc or center of the circle.
Edit Polygons > Extrude (Default settings)
|
|  << SIDE VIEW >> << SIDE VIEW >>
Select the side faces of the second extruded section and then extrude out aligning them with the width of the leg.
|  << SIDE VIEW >> << SIDE VIEW >>
Switch to vertex mode {F8} and reshape newly extruded sections to match the shape to match the shape of the leg. Select the lower corner vertices both back and front and then move them upward.
|
|  << FRONT VIEW >> << FRONT VIEW >>
Scale its width of the section to align with the sides of the back side of the unit.
|  
<< PERSPECTIVE VIEW >>
Switch to face mode {F11} and delete the 2 top left most faces. Select the remaining top faces and the center edge. To activate multiple components at one time, press {CTRL} + {Tab} Now wedge faces Edit Mesh > Wedge Face and under the history node change: -
Arc Angle: 180 -
Divisions: 12 *In some versions, you can only set the divisions to 10 or less. Set it to 10 and then change it to 12 after you made it. This can be done under the objects Input node (the objects history node). |
| 
<< PERSPECTIVE VIEW >>
It should look something like this in X-Ray mode. Now with the above faces still selected, delete them or go inside of the object and delete any internal faces. |

<< PERSPECTIVE VIEW >>
First turn on Poly Count. Display > Heads Up Display and activate Poly Count. Now, switch to vertex mode {F8} and select the entire object then Edit Mesh> Merge. *The number of polygons should reduce by 4 faces. Mine reduced from 74 to 70. |
| 
<< PERSPECTIVE VIEW >>
Now, switch to face mode {F11}  Using the Paint Select Tool, select the outside face loop. See Image. Using the Paint Select Tool, select the outside face loop. See Image.
| 
<< FRONT VIEW >>
With the faces still selected, extrude the faces just a bit to prep for the groove we will be making. Edit Polygons > Extrude 
|
| 
<< FRONT VIEW >>
Repeat the last tool used by pressing {G} this should repeat the extrude tool. Pull the manipulator tool aligning with the outer edge of the leg. | 
<< PERSPECTIVE VIEW >>
Here are the extruded faces in the Perspective View. |
| 
<< SIDE VIEW >>
In the front view, add more divisions to block out the components using the Cut Face Tool. Hold ![Shift_thumb[1] Shift_thumb[1]](https://blogger.googleusercontent.com/img/b/R29vZ2xl/AVvXsEjSwU3_JVZXLXB79IyGqfgg3rYos2iynR7r1SbuPh2nzpGxQE4U9CgZRcdz5oqWdKXDvlJeG9Cw6-CoTKpCTqvcOAuM7Quy5bz8R1zaav-E5Qs3tc5QsWRen6BttvxscuLfX8hJc86_ZFw/?imgmax=800) to lock the cut at 45°angles. Place them above and below the square components edges. to lock the cut at 45°angles. Place them above and below the square components edges.
*Use default Interactive cut settings.
*See horizontal cuts high lighted in brown. | 
<< SIDE VIEW >>
Use the Insert Edge Loop Tool to add an edge loop on blocking out the outside edge of the components.
*Use default settings.
Edit Mesh > Insert Edge Loop Tool
Move the loops the best you can to align with the three boxes. It will not line up exactly, we will the components on the right in a later step.
*See horizontal cuts high lighted in green.
|
| 
<< SIDE VIEW >>
Repeat Last Step. Use the Insert Edge Loop Tool again to add an edge loop on blocking out the inside edge of the components.
*Use default settings.
Move the loops the best you can to align with the inside edge of the three boxes. We will align the edges for the boxes on the right in the next step.
Edit Mesh > Insert Edge Loop Tool
*See horizontal cuts high lighted in green. | 
<< SIDE VIEW >>
Add an additional edge loop using Cut Face Tool so that we can form the next shape using the . Hold {Shift} to lock the cut at 45°angles. Place one cut horizontally crossing the two corner points.
*Use default Interactive cut settings.
*See horizontal cuts high lighted in brown. |
PART 1 PART 2 PART 3 PART 4 PART 5 PART 6 PART 7 PART 8